Alright, so it's not exactly summer yet, but down here in the desert it certainly FEELS like summer. The forecast for the next week includes triple digit temperatures every day. Yikes.
Anyhow, last week some time (I don't really recall the exact day, they all kind of seem the same, lol) the kid and I made what should have been a quick run to Wal-Mart. I needed some household items along with a few grocery items.
OF COURSE, I had to start meandering around looking in sections that I had no business being in, which consequently resulted in me spending more than I should have (once again). I'm pathetic. I even put Evie in her stroller to help curb my incessant shopping because there's less room to put stuff... *sigh*
One of the items that I purchased was this enormous container of strawberries. First of all, they smelled DIVINE--like they were fresh off of the farm. Second, this large container (which is the size of two of those rectangular ones that I usually see strawberries in) was on sale for $2.48.
It would have been a crime for me to pass it up!
So, with the strawberries purchased, brought home, cleaned and cut up, I was left to decide what to do with my tasty purchase. Then, it came to me...
Strawberry shortcakes!!
I scoured the internet for a recipe that was
A. Tasty (meaning that there were good reviews)
B. Only contained ingredients that I already had on hand because after the shopping trip to Wal-Mart, I in no way needed to add even MORE items to my pantry
And I stumbled across this bad boy: http://allrecipes.com/Recipe/Perfect-Berry-Shortcakes/Detail.aspx?prop31=4
(I only used the recipe for the cakes, not the fruit topping)
What was really interesting was that the recipe called for freezing a stick of butter and then grating it into the cake mixture. I think this helped to keep the mixture from getting too liquid-y (if it was room temp). Anyhow, it was an interesting way of adding butter and it was far easier to do than grating baby carrots (like in my attempt to make carrot cake: Who Eats Carrot Cake? )
The mixture came out WICKED sticky and although the recipe didn't call for flouring your hands or your work space, I would suggest doing so.
I popped the cakes into the oven and cooked them for ten and half minutes.
Which turned out to be a tad too long (I'm inclined to believe that gas ovens cook 'hotter' than electric). The bottoms were a smidgen TOO golden brown.
See?
Not burned, per se. And still edible. I think that I may use some parchment paper next time and cut down on the baking time by a minute or so.
As you may have surmised, a little golden brown color on the bottom wasn't going to stop me from eating a delicious strawberry shortcake! I plopped a cake into a bowl, added the fresh strawberries and a few spoonfuls of cool-whip (yes, I eat partially hydrogenated vegetable oil and I think it's freakin' delish).
Tada!
Enjoy!
Search This Blog
Tuesday, May 24, 2011
Monday, May 16, 2011
National Chocolate Chip Day!
In case you all were unaware, May 15th is National Chocolate Chip Day.
I was in the dark about this auspicious day until the Base Housing office dropped of a newsletter indicating that they would be giving away free chocolate chip cookies today (the 16th) to celebrate NCCD. While I still plan on going down to the housing office to go and get myself a free cookie, my mouth was watering at the thought of scarfing down a few dozen cookies, so I made some for myself yesterday.
The recipe that I used is my go-to recipe. It is aptly named the Award Winning Soft Chocolate Chip Cookie recipe (that my twin sister found on allrecipes.com). It's freaking delicious!! The cookies are the perfect consistency and remain soft for at least two days after you bake them.
Despite the fact that it was chocolate CHIP cookie day, I decided to switch it up and use not only chocolate chips (dark chocolate, at that!) but also semi-sweet chocolate chunks.
Remember how in the last post I wrote about how much of a mess I make while baking? Here is an example of my messiness:
Forgive the bumbo on the counter. The kid can actually no longer sit on the counter in the bumbo because she will bend and twist dangerously in that thing and can't be trusted to keep herself safe. Instead, she sits eating puffs in her high chair. Not for this baking venture, though...she napped instead! Also, how 'bout our sweet cabinetry? Gotta love that lowest bidder!
Anyhow, just so you all know, I follow this recipe to the T. Definitely no need to deviate. They truly come out perfectly.
However, I do recommend using a scoop of some sort or at least rolling the balls of dough when placing them onto the cookie sheet. I use the medium sized scoop from Pampered Chef.
When they bake, they don't rise or spread out too much, so feel free to put them fairly close together.
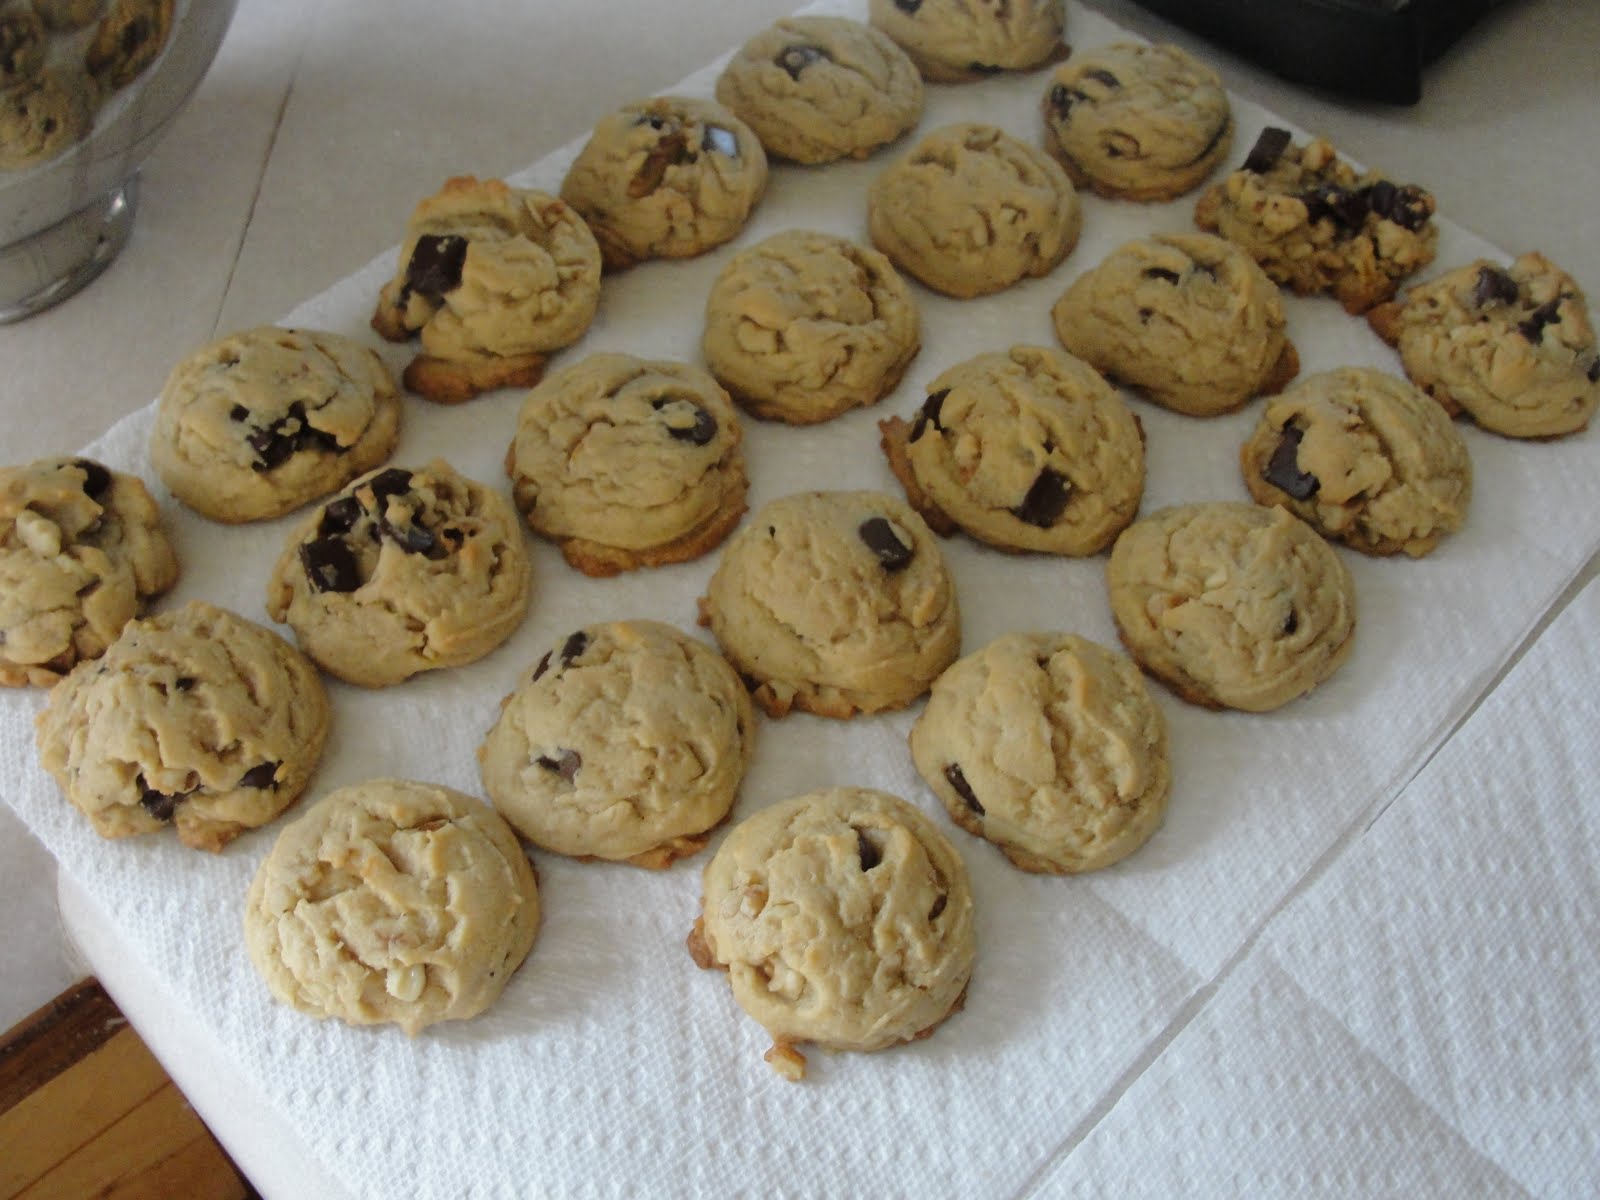
I baked mine for 10.5 minutes and let them sit on the tray for 2-3min before moving them to a cooling rack (or in my case, paper towels because I have no idea what happened to my cooling rack during my move down here).
Perfection!
Warning! This recipe makes about 72 cookies, so if you aren't looking to eat cookies for breakfast, lunch and dinner for a few days I suggest halving the recipe :)
Award Winning Soft Chocolate Chip Cookie Recipe
I was in the dark about this auspicious day until the Base Housing office dropped of a newsletter indicating that they would be giving away free chocolate chip cookies today (the 16th) to celebrate NCCD. While I still plan on going down to the housing office to go and get myself a free cookie, my mouth was watering at the thought of scarfing down a few dozen cookies, so I made some for myself yesterday.
The recipe that I used is my go-to recipe. It is aptly named the Award Winning Soft Chocolate Chip Cookie recipe (that my twin sister found on allrecipes.com). It's freaking delicious!! The cookies are the perfect consistency and remain soft for at least two days after you bake them.
Despite the fact that it was chocolate CHIP cookie day, I decided to switch it up and use not only chocolate chips (dark chocolate, at that!) but also semi-sweet chocolate chunks.
Remember how in the last post I wrote about how much of a mess I make while baking? Here is an example of my messiness:
Forgive the bumbo on the counter. The kid can actually no longer sit on the counter in the bumbo because she will bend and twist dangerously in that thing and can't be trusted to keep herself safe. Instead, she sits eating puffs in her high chair. Not for this baking venture, though...she napped instead! Also, how 'bout our sweet cabinetry? Gotta love that lowest bidder!
Anyhow, just so you all know, I follow this recipe to the T. Definitely no need to deviate. They truly come out perfectly.
However, I do recommend using a scoop of some sort or at least rolling the balls of dough when placing them onto the cookie sheet. I use the medium sized scoop from Pampered Chef.
When they bake, they don't rise or spread out too much, so feel free to put them fairly close together.
I baked mine for 10.5 minutes and let them sit on the tray for 2-3min before moving them to a cooling rack (or in my case, paper towels because I have no idea what happened to my cooling rack during my move down here).
Perfection!
Warning! This recipe makes about 72 cookies, so if you aren't looking to eat cookies for breakfast, lunch and dinner for a few days I suggest halving the recipe :)
Award Winning Soft Chocolate Chip Cookie Recipe
Monday, May 9, 2011
Magic in the Middle
It seems like eons ago, but once, maybe a few years ago at this point, my twin sister made these delicious cookies. They weren't your typical run of the mill cookie. They were magic and housed a tasty surprise. I've been thinking about them for quite some time and finally got the gumption to get my rear in gear and make some.
I'll be honest, I actually made these cookies last night and didn't take any pictures. BUT, there was a good reason behind it. You see, I made The Biggest Mess you ever saw while trying to make the darn things. SO MUCH work was involved, but I was hell bent on having some as a Mother's Day treat to myself.
The cookies are called Magic Middles. They are a cocoa cookie with a peanut butter middle. Hence the mess. Thank the good Lord that the baby was napping; otherwise, it would have been a nightmare to bake, clean up, and keep her entertained.
I started off making the peanut butter filling first. I made certain to read though a bunch of reviews of the recipe to see if there were any suggested alterations and I learned a few tips. The first of which was to freeze the middles. So, I whipped up the peanut butter (all I had was extra chunky) and confectioner sugar and then formed them into 30 balls (my hands STILL smell like peanut butter). The balls were sealed into a container and then placed in the freezer while I made the outside portion of the cookie.
In the midst of trying to make the cocoa portion, I managed to get cocoa, sugar, flour, and baking soda EVERYWHERE. It was sad. I think I try SO HARD to NOT make a mess, that it backfires somehow. *sigh* It was at this point that I decided to keep my camera out of the kitchen.
I pretty much followed the recipe, however I did add about a tablespoon of sour cream to make the cocoa mixture a bit more moist (it was some advice that reviewers had mentioned) so that it wouldn't break while encasing the peanut butter balls.
Luckily, I ended up with a lot of extra cocoa mixture (and therefore not enough peanut butter balls) and I was able to recreate some pictures for you all this morning when I whipped up yet another batch of peanut butter middles to use the rest of the extra cocoa mixture!
Here are the hand rolled peanut butter balls!
An example of how I rolled the balls up into the cocoa mixture:
All rolled up! And then flattened out (with a sprinkle of sugar on top)!
Aaaaaannnnnnnnnnd...... the finished product!!
Clearly I took a bite out of it for you to see the delicious and magical peanut butter middle.
You can find the recipe here: http://allrecipes.com/Recipe/Magic-Peanut-Butter-Middles/Detail.aspx
I'll be honest, I actually made these cookies last night and didn't take any pictures. BUT, there was a good reason behind it. You see, I made The Biggest Mess you ever saw while trying to make the darn things. SO MUCH work was involved, but I was hell bent on having some as a Mother's Day treat to myself.
The cookies are called Magic Middles. They are a cocoa cookie with a peanut butter middle. Hence the mess. Thank the good Lord that the baby was napping; otherwise, it would have been a nightmare to bake, clean up, and keep her entertained.
I started off making the peanut butter filling first. I made certain to read though a bunch of reviews of the recipe to see if there were any suggested alterations and I learned a few tips. The first of which was to freeze the middles. So, I whipped up the peanut butter (all I had was extra chunky) and confectioner sugar and then formed them into 30 balls (my hands STILL smell like peanut butter). The balls were sealed into a container and then placed in the freezer while I made the outside portion of the cookie.
In the midst of trying to make the cocoa portion, I managed to get cocoa, sugar, flour, and baking soda EVERYWHERE. It was sad. I think I try SO HARD to NOT make a mess, that it backfires somehow. *sigh* It was at this point that I decided to keep my camera out of the kitchen.
I pretty much followed the recipe, however I did add about a tablespoon of sour cream to make the cocoa mixture a bit more moist (it was some advice that reviewers had mentioned) so that it wouldn't break while encasing the peanut butter balls.
Luckily, I ended up with a lot of extra cocoa mixture (and therefore not enough peanut butter balls) and I was able to recreate some pictures for you all this morning when I whipped up yet another batch of peanut butter middles to use the rest of the extra cocoa mixture!
Here are the hand rolled peanut butter balls!
An example of how I rolled the balls up into the cocoa mixture:
All rolled up! And then flattened out (with a sprinkle of sugar on top)!
Aaaaaannnnnnnnnnd...... the finished product!!
Clearly I took a bite out of it for you to see the delicious and magical peanut butter middle.
You can find the recipe here: http://allrecipes.com/Recipe/Magic-Peanut-Butter-Middles/Detail.aspx
Tuesday, May 3, 2011
The Most Inconsiderate Pie Eater
My mother-in-law and I were in the commissary (that's military talk for grocery store) this weekend and my keen eyesight spotted a rare find---rhubarb! For those of you unfamiliar with rhubarb, it's a stalk-y plant that resembles a thick magenta colored stalk of celery. Like this:
I never had the opportunity to ever taste rhubarb until I was about 20 years old. That was when my husband's grandmother, Nani, made her famous strawberry rhubarb pie when we were visiting her down in Florida.
Oh. Mah. Gawd.
It was like heaven on a plate. I loved it SO much, that I ate the last slice for breakfast--much to the chagrin of Eric's brother, Tim, who for the rest of the vacation referred to me as the Most Inconsiderate Strawberry Rhubarb Pie Eater. I didn't care. That slice of pie was worth it!
Anyhow, it took YEARS, but Nani finally relinquished her sacred recipe to my MIL so that I could try baking it on my own. Since receiving the recipe, the results have been hit or miss. The misses being a disgusting soupy mess. Ick.
Well, when I saw the rhubarb in the grocery store I decided it was time for another try (practice makes perfect, right?). So, I packed up the kid, picked up some strawberries, rhubarb, and pie crusts (the pre-made kind because I'm not THAT dedicated to a 'homemade' pie).
We returned home with the goods and I plopped her in her high chair with some rice puffs to entertain her whilst I chopped up the rhubarb and strawberries. I chopped the strawberries and rhubarb into bit-sized pieces:
Here's the kid! See, she's happy while momma bakes!
After you cut up the strawberries and rhubarb you mix them with the other ingredients: tapioca, sugar, and flour to make the filling and let it set for 30min. While the filling is setting you break out the pie crusts and put one into the bottom of the pie tin/plate/whatever. After the thirty minutes is up you can definitely see a difference.
The tapioca is key in making sure that the filling is gelatinous instead of a soupy mess.
Once the filling has been spooned into the pie, place the second pie crust on the top and edge the pie with milk and press the crusts together with a fork. Then put some butter on top and sprinkle some sugar. Don't forget to cut some vent holes on the top!
It's best to put a cookie sheet under the pie...just in case the filling bubbles out (I lined my cookie sheet with tin foil for an easy clean up).
Bake for 50min and you're done!!
I bet you're asking yourselves, was this pie a hit or a miss?
The answer is, it was a DIRECT HIT!! Right on the bullseye!
Here it is ladies and gents! The most fabulous pie you will EVER eat in your ENTIRE lives!
Strawberry Rhubarb Pie Recipe
Ingredients:
1lb rhubarb (about 3.5 - 4 cups)
2 pints of strawberries (about 3.5 - 4 cups)
1 1/4 cup of sugar
1/3 cup of flour
3 tbsp of tapioca
1/4 tsp of salt
1 tbsp of butter
1 tbsp of milk
**
Instructions:
Preheat the oven to 425 degrees. Mix together sugar, flour, tapioca, and salt. Then mix strawberries and rhubarb with mixture. Let stand for 30 minutes. Get pie crusts ready (9"). Spoon filling into crust. Place pieces of butter on top of filling. Put top crust on. Edge with milk. Drop butter and sugar on top of crust.
*I personally enjoy this pie cold, so once you've had a slice, put the rest into the fridge and enjoy a piece for breakfast!
**Also, I left out the most secret ingredient...my husband insisted, it is HIS Nani's special recipe. If you'd like to make this recipe, email me and I'll tell you after I've sworn you to secrecy!**
I never had the opportunity to ever taste rhubarb until I was about 20 years old. That was when my husband's grandmother, Nani, made her famous strawberry rhubarb pie when we were visiting her down in Florida.
Oh. Mah. Gawd.
It was like heaven on a plate. I loved it SO much, that I ate the last slice for breakfast--much to the chagrin of Eric's brother, Tim, who for the rest of the vacation referred to me as the Most Inconsiderate Strawberry Rhubarb Pie Eater. I didn't care. That slice of pie was worth it!
Anyhow, it took YEARS, but Nani finally relinquished her sacred recipe to my MIL so that I could try baking it on my own. Since receiving the recipe, the results have been hit or miss. The misses being a disgusting soupy mess. Ick.
Well, when I saw the rhubarb in the grocery store I decided it was time for another try (practice makes perfect, right?). So, I packed up the kid, picked up some strawberries, rhubarb, and pie crusts (the pre-made kind because I'm not THAT dedicated to a 'homemade' pie).
We returned home with the goods and I plopped her in her high chair with some rice puffs to entertain her whilst I chopped up the rhubarb and strawberries. I chopped the strawberries and rhubarb into bit-sized pieces:
Here's the kid! See, she's happy while momma bakes!
After you cut up the strawberries and rhubarb you mix them with the other ingredients: tapioca, sugar, and flour to make the filling and let it set for 30min. While the filling is setting you break out the pie crusts and put one into the bottom of the pie tin/plate/whatever. After the thirty minutes is up you can definitely see a difference.
Before After
The tapioca is key in making sure that the filling is gelatinous instead of a soupy mess.
Once the filling has been spooned into the pie, place the second pie crust on the top and edge the pie with milk and press the crusts together with a fork. Then put some butter on top and sprinkle some sugar. Don't forget to cut some vent holes on the top!
It's best to put a cookie sheet under the pie...just in case the filling bubbles out (I lined my cookie sheet with tin foil for an easy clean up).
Bake for 50min and you're done!!
I bet you're asking yourselves, was this pie a hit or a miss?
The answer is, it was a DIRECT HIT!! Right on the bullseye!
Here it is ladies and gents! The most fabulous pie you will EVER eat in your ENTIRE lives!
Strawberry Rhubarb Pie Recipe
Ingredients:
1lb rhubarb (about 3.5 - 4 cups)
2 pints of strawberries (about 3.5 - 4 cups)
1 1/4 cup of sugar
1/3 cup of flour
3 tbsp of tapioca
1/4 tsp of salt
1 tbsp of butter
1 tbsp of milk
**
Instructions:
Preheat the oven to 425 degrees. Mix together sugar, flour, tapioca, and salt. Then mix strawberries and rhubarb with mixture. Let stand for 30 minutes. Get pie crusts ready (9"). Spoon filling into crust. Place pieces of butter on top of filling. Put top crust on. Edge with milk. Drop butter and sugar on top of crust.
*I personally enjoy this pie cold, so once you've had a slice, put the rest into the fridge and enjoy a piece for breakfast!
**Also, I left out the most secret ingredient...my husband insisted, it is HIS Nani's special recipe. If you'd like to make this recipe, email me and I'll tell you after I've sworn you to secrecy!**
Thursday, April 28, 2011
The Perfect Combination
It is my personal opinion that God smiled down on the Earth the day that some genius decided to put chocolate and peanut butter together.
Seriously.
It must be the saltiness of the peanut butter mixed with the sweetness of the chocolate--it somehow creates a symphony in my mouth. My taste buds rejoice!
Yesterday, my daughter, Evelyn, and I were invited to go to a scrapbooking get together that's taking place this afternoon. I do not have the patience nor the motivation to scrapbook, but I'm a huge fan of hanging out with other adults (other SAHMs know what I'm talking about). To me, a get together is a perfect excuse to bake something delicious.
Last night the baby decided to stay up late (which she's been doing a lot of lately), so I didn't have the alone time necessary to bake up something from scratch. So, I made these instead:
That's right!
Q: What's better than regular fudge brownies?
A: DOUBLE fudge brownies!
I know what you're thinking...why was this chick jabbering on and on about chocolate and peanut butter when all she made were lousy brownies out of the box?
Oh ye of little faith...
Q: What's better than double fudge brownies?
A: How about double fudge brownies with bits of Reese's peanut butter cups in them?!??!?!?
Behold!
Of course, I simply HAD to taste test them fresh from the oven last night. They were fabulous. All I did was simply use the recipe on the back of the box, cut up the peanut butter cups like they were mini pizzas, and them shoved them into the batter. I only cooked it for 33min (as opposed to the 35min the box suggested) and VOILA!
Seriously.
It must be the saltiness of the peanut butter mixed with the sweetness of the chocolate--it somehow creates a symphony in my mouth. My taste buds rejoice!
Yesterday, my daughter, Evelyn, and I were invited to go to a scrapbooking get together that's taking place this afternoon. I do not have the patience nor the motivation to scrapbook, but I'm a huge fan of hanging out with other adults (other SAHMs know what I'm talking about). To me, a get together is a perfect excuse to bake something delicious.
Last night the baby decided to stay up late (which she's been doing a lot of lately), so I didn't have the alone time necessary to bake up something from scratch. So, I made these instead:
That's right!
Q: What's better than regular fudge brownies?
A: DOUBLE fudge brownies!
I know what you're thinking...why was this chick jabbering on and on about chocolate and peanut butter when all she made were lousy brownies out of the box?
Oh ye of little faith...
Q: What's better than double fudge brownies?
A: How about double fudge brownies with bits of Reese's peanut butter cups in them?!??!?!?
Behold!
Wednesday, April 27, 2011
Who Eats Carrot Cake?
I'll admit, if someone were to ask me what kind of cake I'd like for my birthday, I'd probably respond with, "Nothing fancy. Probably one of those chocolate cake mixes with chocolate frosting." It clearly doesn't take much to please me. Just throw some chocolate at me and I'm a happy woman.
My husband, on the other hand, decided that he'd like a carrot cake for his birthday. Um, gross? Don't get me wrong, I have nothing against carrot cake other than the fact that it sounds so....healthy. In my world of delectable desserts, carrots and cake do NOT mix.
It wasn't my birthday though. So, carrot cake was on the dessert menu for the night of April 26th.
I began looking for recipes a little while back and found that carrot cake is NOT healthy. The frosting alone contains obscene amounts of cream cheese, butter, and sugar. Luckily, I am a subscriber to Cooking Light. In general, I hardly ever find a recipe worth using in the magazine--it's all a little to fancy-pantsy for me. However, they just so happened to publish a recipe for a carrot cake that reduced the calorie count from nearly 1,100 per slice to about 290 calories per slice. Score!
I made up a list of ingredients, packed up my kid, and headed 15min down the road to our local Wal-Mart (it's one of those super Wal-Marts with a grocery store).
Did I mention that it was the day after Easter? Have I ever mentioned that I'm a sucker for clearance items?
Needless to say, I walked out of Wal-Mart with many items that were most definitely NOT on my grocery list.
Oh, and I forgot to buy the carrots. You read that right. I went shopping for ingredients for carrot cake and walked out of the store WITHOUT the darn carrots. As it happens, I ended up having a bag of baby carrots stuffed in the back of my vegetable drawer that I decided to use.
Unfortunately, using baby carrots on a grater is not the best idea--as evidenced by this picture:

Forgive my nasty dry hands (I'm obviously in desperate need of a manicure) and just focus on the small scabs on my knuckle. That would be the result of grating short and stubby little baby carrots.
There may or may not have been trace amounts of blood in the cake batter.
In the end, the cake was...ok. Let's recall, I'm not a huge fan in the first place. My husband and his buddies said that it tasted great and everyone cleaned their plates; therefore, I shall deem the carrot cake a success!

[My husband, kid, and the cake!]
Recipe used from Cooking Light April 2011 issue, pg 172
Carrot Cake
Cake:
Preparation
My husband, on the other hand, decided that he'd like a carrot cake for his birthday. Um, gross? Don't get me wrong, I have nothing against carrot cake other than the fact that it sounds so....healthy. In my world of delectable desserts, carrots and cake do NOT mix.
It wasn't my birthday though. So, carrot cake was on the dessert menu for the night of April 26th.
I began looking for recipes a little while back and found that carrot cake is NOT healthy. The frosting alone contains obscene amounts of cream cheese, butter, and sugar. Luckily, I am a subscriber to Cooking Light. In general, I hardly ever find a recipe worth using in the magazine--it's all a little to fancy-pantsy for me. However, they just so happened to publish a recipe for a carrot cake that reduced the calorie count from nearly 1,100 per slice to about 290 calories per slice. Score!
I made up a list of ingredients, packed up my kid, and headed 15min down the road to our local Wal-Mart (it's one of those super Wal-Marts with a grocery store).
Did I mention that it was the day after Easter? Have I ever mentioned that I'm a sucker for clearance items?
Needless to say, I walked out of Wal-Mart with many items that were most definitely NOT on my grocery list.
Oh, and I forgot to buy the carrots. You read that right. I went shopping for ingredients for carrot cake and walked out of the store WITHOUT the darn carrots. As it happens, I ended up having a bag of baby carrots stuffed in the back of my vegetable drawer that I decided to use.
Unfortunately, using baby carrots on a grater is not the best idea--as evidenced by this picture:
Forgive my nasty dry hands (I'm obviously in desperate need of a manicure) and just focus on the small scabs on my knuckle. That would be the result of grating short and stubby little baby carrots.
There may or may not have been trace amounts of blood in the cake batter.
In the end, the cake was...ok. Let's recall, I'm not a huge fan in the first place. My husband and his buddies said that it tasted great and everyone cleaned their plates; therefore, I shall deem the carrot cake a success!

[My husband, kid, and the cake!]
Recipe used from Cooking Light April 2011 issue, pg 172
Carrot Cake
Cake:
- 10 1/10 ounces all-purpose flour (about 2 1/4 cups)
- 2 teaspoons baking powder
- 1 1/2 teaspoons ground cinnamon
- 1/4 teaspoon salt
- 2 cups grated carrot
- 1 cup granulated sugar
- 1/2 cup packed brown sugar
- 6 tablespoons butter, softened
- 3 large eggs
- 1 teaspoon vanilla extract
- 1/2 cup low-fat buttermilk
- Cooking spray
- Frosting:
- 6 ounces cream cheese, softened
- 1 ounce fromage blanc (if you can't find fromage blanc, use more cream cheese)
- 2 tablespoons butter, softened
- 1/2 teaspoon vanilla extract
- 1/8 teaspoon salt
- 3 cups powdered sugar
- 1/4 cup chopped pecans, toasted
- 1. Preheat oven to 350°.
- 2. To prepare cake, weigh or lightly spoon flour into dry measuring cups, and level with a knife. Combine flour, 2 teaspoons baking powder, ground cinnamon, and 1/4 teaspoon salt in a medium bowl, stirring with a whisk. Add 2 cups grated carrot, tossing to combine.
- 3. Place granulated sugar, brown sugar, and 6 tablespoons butter in a large bowl. Beat with a mixer at medium speed until combined. Add eggs, 1 at a time, beating well after each addition. Stir in 1 teaspoon vanilla. Add flour mixture and buttermilk alternately to sugar mixture, beginning and ending with flour mixture. Spread batter into a 13 x 9-inch metal baking pan coated with cooking spray. Bake at 350° for 28 minutes or until a wooden pick inserted in center comes out clean. Cool cake completely on a wire rack.
- 4. To prepare frosting, place softened cream cheese and next 4 ingredients (through 1/8 teaspoon salt) in a medium bowl. Beat with a mixer at medium speed until fluffy. Gradually add powdered sugar, beating at medium speed until combined (don't overbeat). Spread frosting evenly over top of cake. Sprinkle evenly with toasted pecans.
Kathy Kitchens Downie, RD, Cooking Light
APRIL 2011
APRIL 2011
The Beginning
I've never been much of a baker. I AM, however, a big fan of eating baked goods. I would often find myself munching away on the delicious treats that co-workers would bring in for various office parties or even swinging by the local bakery after work for one of those GINORMOUS m&m cookies (you know the ones!).
Sadly, I am no longer employed NOR do I live near a halfway decent bakery. It's by choice. Not necessarily MY choice. But, what's done is done.
You see, I am currently living in Texas. And by Texas I mean the border of Mexico. Seriously. The closest city is three hours away. Why am I in the desert of Texas by choice? Well, I'm trying very hard to be a supportive wife to my husband who is currently fulfilling his dream of being a pilot in the USAF.
So, what's a girl to do when she wants to eat baked goods but has no one to bake them for her? Simple, that girl needs to find a decent recipe website (I'm a huge fan of allrecipes.com) and start working on her baking skills.
That's what this blog will be about. My forays into the baking world. I will showcase every triumph and every disaster as well as provide you with the recipe so that you can try it out as well--not that you'd want to try out the failures, per se. But, you never know!
Subscribe to:
Posts (Atom)